The Ultimate Guide to Photographing the Northern Lights!
Without Freezing Your Butt Off

So, you’ve decided to photograph the Northern Lights. Congrats! You’re about to go on an adventure that involves equal parts patience, preparation, and possibly some frostbite(hopefully not though, that's why you're reading this) . But don’t worry I’ve got you covered with everything you need to know, from camera gear to the right underwear (yes, it matters).
Understanding the Northern Lights
Before we get into the gear talk, let’s quickly go over what’s actually happening in the sky. The Northern Lights (a.k.a. Aurora Borealis if you want to be fancy) occur when charged particles from the sun crash into Earth’s magnetic field, creating a light show that looks like Mother Nature is showing off. Colors vary from green to purple to red, depending on the atmospheric gases involved.
The key takeaway? The Northern Lights are unpredictable. They don’t show up on demand, and sometimes they ghost you entirely. But when they do appear, it’s pure magic.
How to Predict the Northern Lights
Okay, so how do you actually know when to go outside instead of staring at the sky like a lost tourist? Here’s how to check the aurora forecast:
1. The Kp Index (Geomagnetic Activity Level)
The Kp index is a scale from 0 to 9 that tells you how strong the aurora activity might be.
• Kp 0-2 – Stay inside. The aurora is taking the night off(Not 100% accurate though)
• Kp 3-4 – Good chance of seeing lights in high, latitude areas (Iceland, Norway, etc.).
• Kp 5+ – Boom! You’ve got a geomagnetic storm, meaning the lights may be visible even farther south.
Check out sites like:
Iceland At Night (My favourite)
I also love to use the Aurora app on iOS, it's probably also available for android.
2. Cloud Cover
This is crucial. Even if the aurora is going crazy, clouds will ruin everything. Use weather apps that show cloud cover forecasts, like:
• Veðurstofan (for Iceland specific forecasts)
• Yr.no(Norway based but good for general Arctic forecasts)
• Windy.com (Great for visualizing cloud movement)
3. Solar Wind Data (For the Nerds)
If you want to go full scientist mode, check solar wind speed and density. High speed solar wind = higher aurora chances. Look at:
• ACE Real-Time Solar Wind (NASA’s Solar Weather site)
4. Moon Phase
A full moon can wash out weaker auroras. If possible, aim for a new moon or a crescent moon phase for the best contrast.
5. Best Time of Night
Typically, the aurora is most active between 9 PM and 2 AM, but it can appear earlier or later. Be patient.
When and Where to See Them
Best Time:
• September to March is prime time, as the nights are long and dark.
• Around midnight is usually best, but the lights can show up anytime.
• Avoid full moons if possible (unless you want an extra challenge).
Best Locations:
• Iceland (duh)
• Norway (Tromsø is a hotspot)
• Sweden, Finland, Canada, Alaska basically, anywhere near the Arctic Circle
Avoid cities, light pollution is the enemy. Get as far away from streetlights as you can. If you find yourself in the middle of nowhere, you’re doing it right.
What You’ll Need (Gear Guide)
If you think your phone’s night mode will do the trick, let me stop you right there. You need real gear for this for real pictures BUT phones can capture this, I'll make a separate guide for that, no worries.
Camera:
A DSLR or mirrorless camera with manual settings is your best bet. If your camera can’t handle long exposures, it’s probably going to struggle.
Lens:
• Wide-angle (14mm–24mm is ideal)
• Fast aperture (f/2.8 or lower) to let in as much light as possible
Tripod:
This is non negotiable. The Northern Lights require long exposures, and even the steadiest hands will mess it up without a tripod. Get a sturdy one, wind is a thing.
Remote Shutter Release (or Timer Mode):
Pressing the shutter by hand can introduce camera shake. A remote release or a 2-second timer fixes that.
Extra Batteries:
Cold kills batteries faster than you can say aurora borealis. Keep extras in your pockets to keep them warm.
Memory Cards:
Big ones. Shooting in RAW takes up space, and you don’t want to be deleting photos in the middle of a light show.
Dressing for Arctic Photography (a.k.a. How to Not Freeze to Death)
If you think you can stand still for two hours in -10°C weather without proper clothing, you’re in for a miserable time. Trust me, being cold will ruin your experience.
Layering is Key:
• Base Layer: Thermal underwear (no cotton, go for wool or synthetic).
• Mid Layer: Fleece or down to trap heat.
• Outer Layer: Windproof and waterproof jacket or a parka if its super cold and pants.
Extremities:
• Insulated gloves (thin inner gloves help if you need to adjust camera settings).
• Thick wool socks and warm boots (frozen toes = game over).
• A hat(húfa in Icelandic, I love húfas). Preferably one that covers your ears.
Hand warmers are your best friend, stick them in your gloves and boots.
Camera Settings for Northern Lights
If you leave your camera on auto, it’s going to give you a pitch-black photo. You need to take control:
• Aperture: Wide open (f/2.8 or lower). More light = better photo.
• Shutter Speed: Start at 5-10 seconds. If the lights are moving fast, shorten it.
• ISO: 1600–3200 is a good starting point. Higher ISO brightens the image but also adds noise.
• Focus: Manual focus. Autofocus struggles in the dark. Use live view and focus on a bright star.
Take a few test shots and adjust as needed. No two nights are the same.
Composing the Shot
The Northern Lights are stunning, but a good composition takes your photo to the next level.
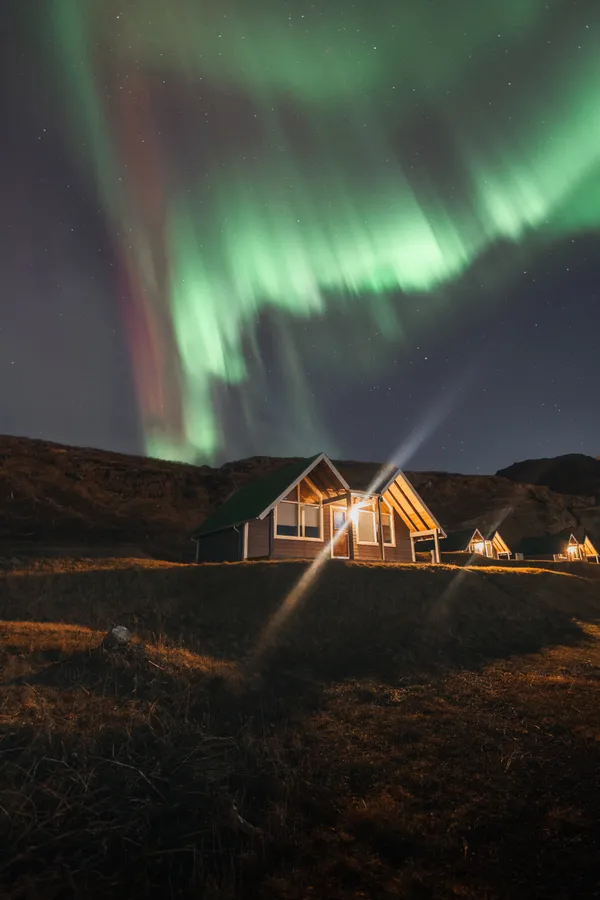
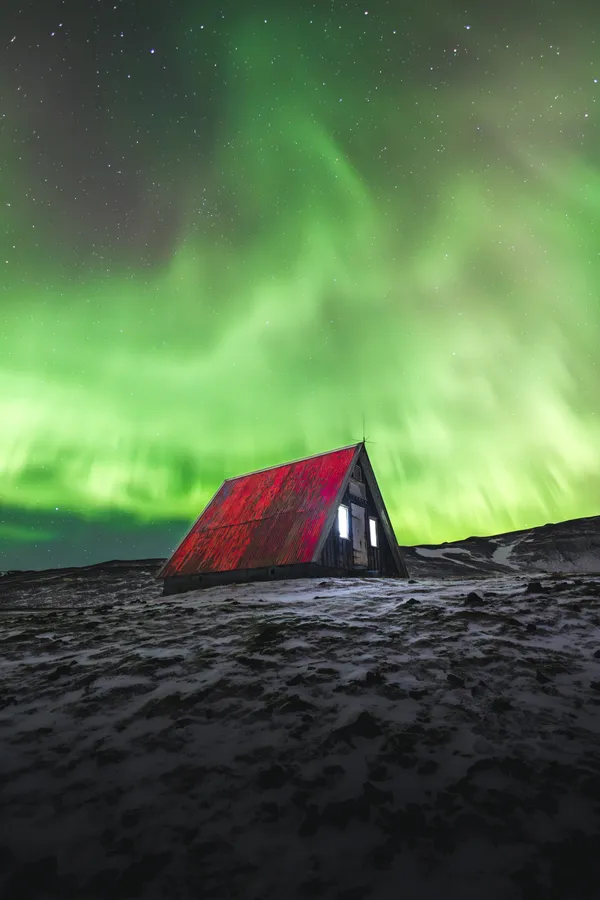
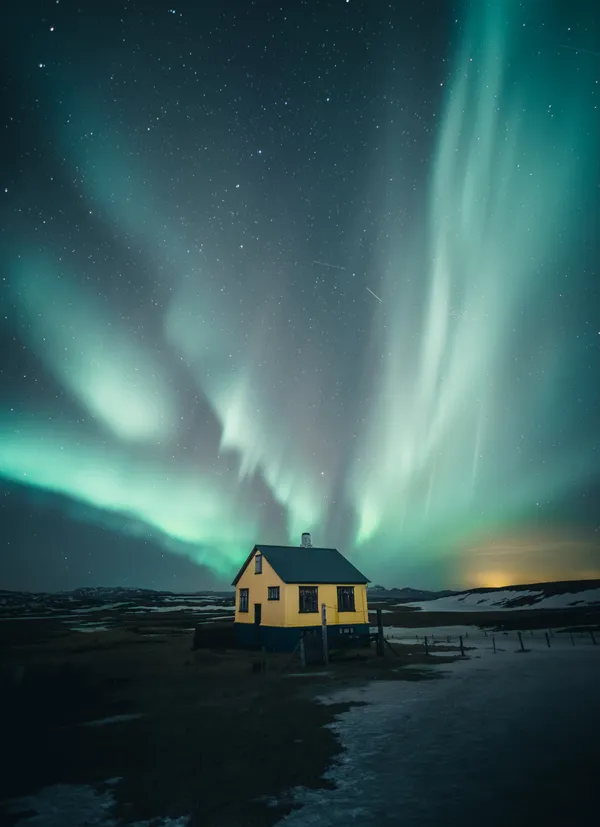
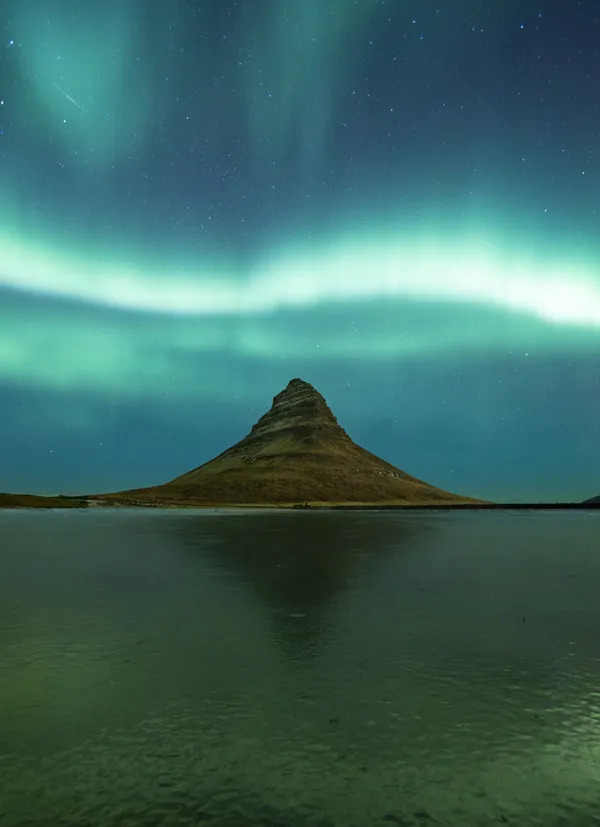
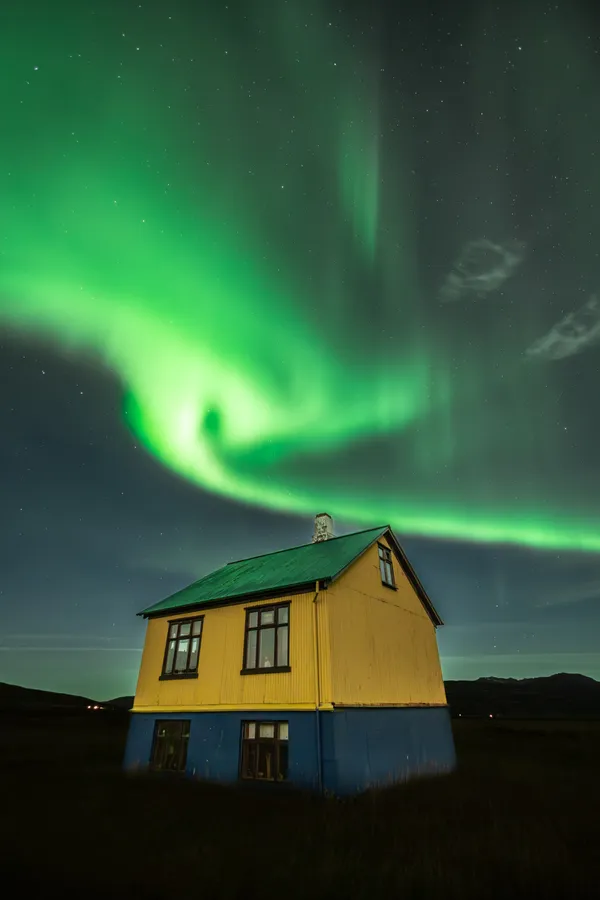
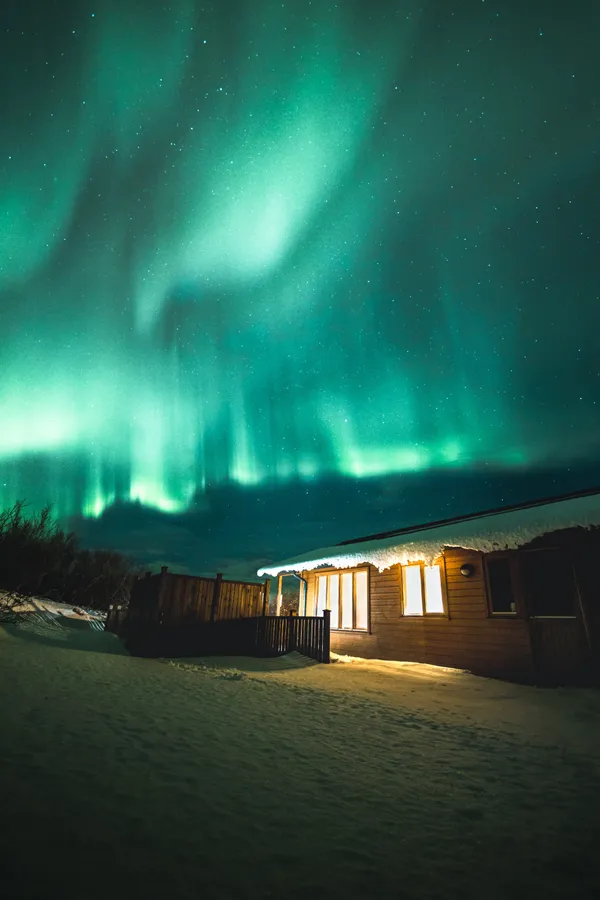
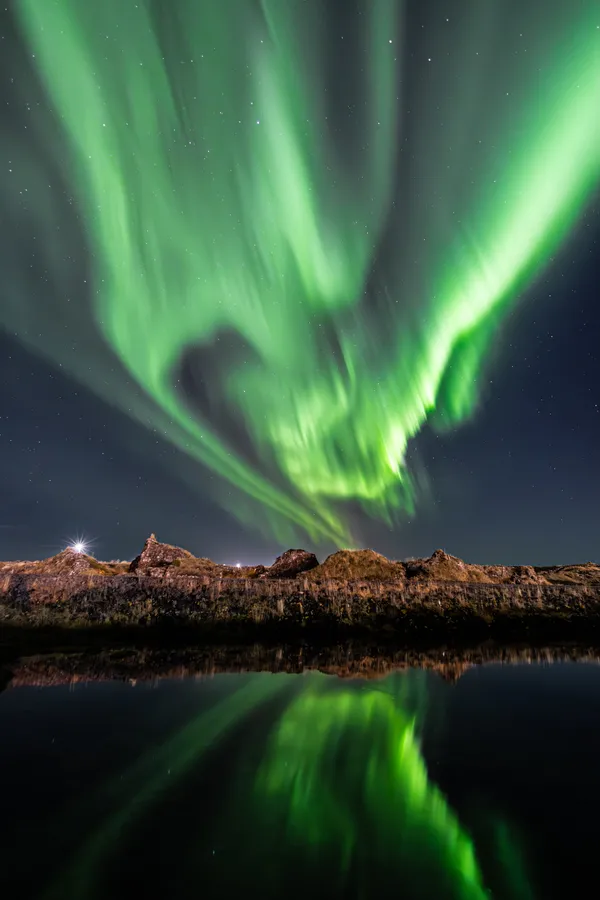
• Foreground Interest: A cabin, a mountain, or a frozen lake adds depth.
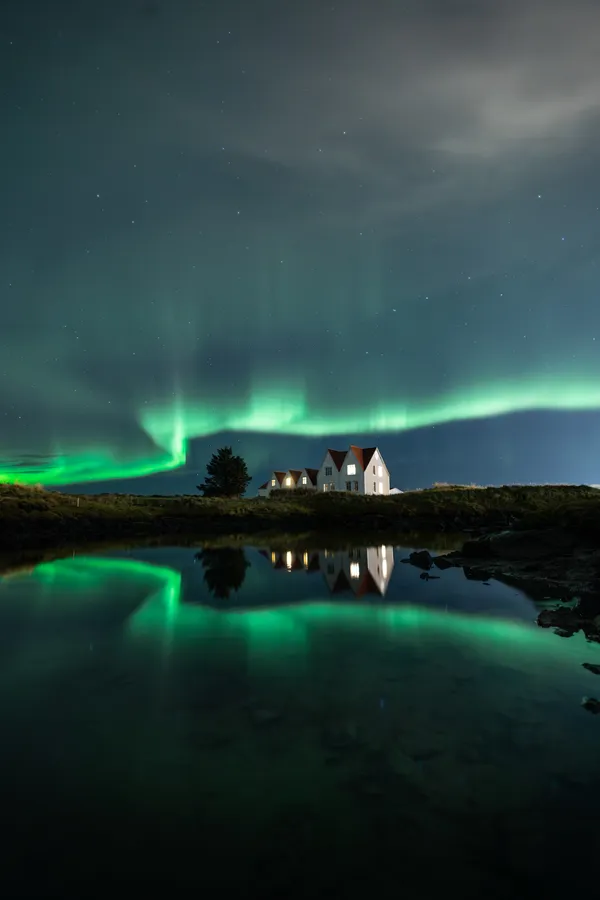
• Reflections: Water can create epic mirror shots.
• Silhouettes: If you’ve got a friend (or yourself), try adding a human element.
And please, don’t just point your camera straight up and call it a day.
How to Stay Sane While Waiting
Here’s the thing: Northern Lights photography involves a lot of standing around in the cold, hoping the sky cooperates. Some tips for keeping your sanity:
• Bring snacks. Hunger makes everything worse.
• Listen to music. Standing in the dark gets eerie fast.
• Set up camp early. Get your camera ready before the lights appear.
• Accept that nature does what it wants. Even if the forecast looks good, the aurora might not show. That’s part of the adventure.
Locations near Reykjavik to see the lights!
Grótta Lighthouse
If you want a convenient spot to watch the Northern Lights without venturing too far, Grótta Lighthouse in Seltjarnarnes is a solid choice. Just a five-minute drive from downtown Reykjavik, this location offers dark skies and a picturesque lighthouse to add depth to your photos. However, its proximity to the city means you won’t be alone, expect to share the view with plenty of locals and tourists.
Lake Kleifarvatn
Reykjanes Peninsula has some fantastic viewing locations, and Lake Kleifarvatn is one of the best. Located about 30 minutes south of Reykjavik along Route 42, this is the largest lake in the area. By day, it’s popular with birdwatchers and hikers, but at night, it transforms into a serene Northern Lights spot. If you visit in daylight first, you can scout the perfect place to set up for the show.
Lake Hvaleyrarvatn
If you don’t want to drive too far past Hafnarfjörður, Lake Hvaleyrarvatn is a great alternative. A small car park on the western side provides easy access to a scenic walking trail along the southern shore. On a clear night, the Aurora Borealis might even reflect off the still waters, creating a magical sight.
Garður
Another gem on the Reykjanes Peninsula is the village of Garður, about an hour from Reykjavik. Here, two historic lighthouses stand at the tip of the peninsula, providing a dramatic foreground for Northern Lights photography. The older, shorter lighthouse dates back to 1897, while the taller one was built in 1944 both offer spectacular views of the auroras dancing over the ocean.
Þingvellir National Park
Þingvellir is already famous as the site of Iceland’s first parliament and the meeting point of the North American and Eurasian tectonic plates. But it’s also a fantastic Northern Lights location, less than an hour from Reykjavik. Standing in a place where two continents drift apart while watching the sky explode with color? Pretty unforgettable.
Hvalfjörður (My favorite)
Hvalfjörður is hands down my favorite spot to shoot the Northern Lights, mostly because there’s no one else around to ruin my long exposures with their headlights or phone screens. The fjord is like nature’s own infinity mirror, with calm waters reflecting the auroras so perfectly that sometimes I don’t know which way is up. It’s dark, peaceful, and just remote enough that you start questioning if you’re in a magical wonderland or just really, really lost. Either way, the lights always put on a show, and the mountains make sure the scenery is as dramatic as my reaction when they hit peak intensity!
If you made it this far and want to see more of these type of articles, please consider getting my personal guide here, you can ask me questions and there is a ton of useful information about traveling in Iceland, and over 600 locations.
USE CODE: reddit25 for 25% off

Op zoek naar dingen om te doen?
Bekijk mijn gids voor de beste gratis dingen om te doen, evenals routes en reistips om uw reis onvergetelijk te maken.